Change IG Reel Cover Image
Step — 1
Create or Select Your Cover Photo
Choose an image: Select an image that is visually appealing, relevant to your Reel’s content, and high-quality.
Step — 2
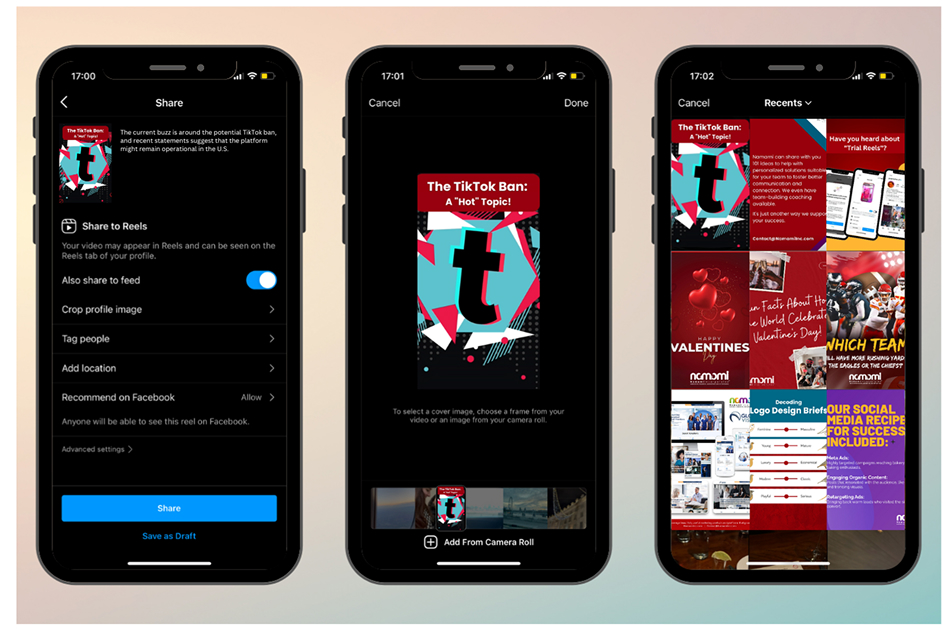
Upload Your Reel to Instagram:
- Follow the usual steps to upload your Reel to Instagram.
- Add any necessary filters, music, and effects.
Step — 3
Edit Your Reel:
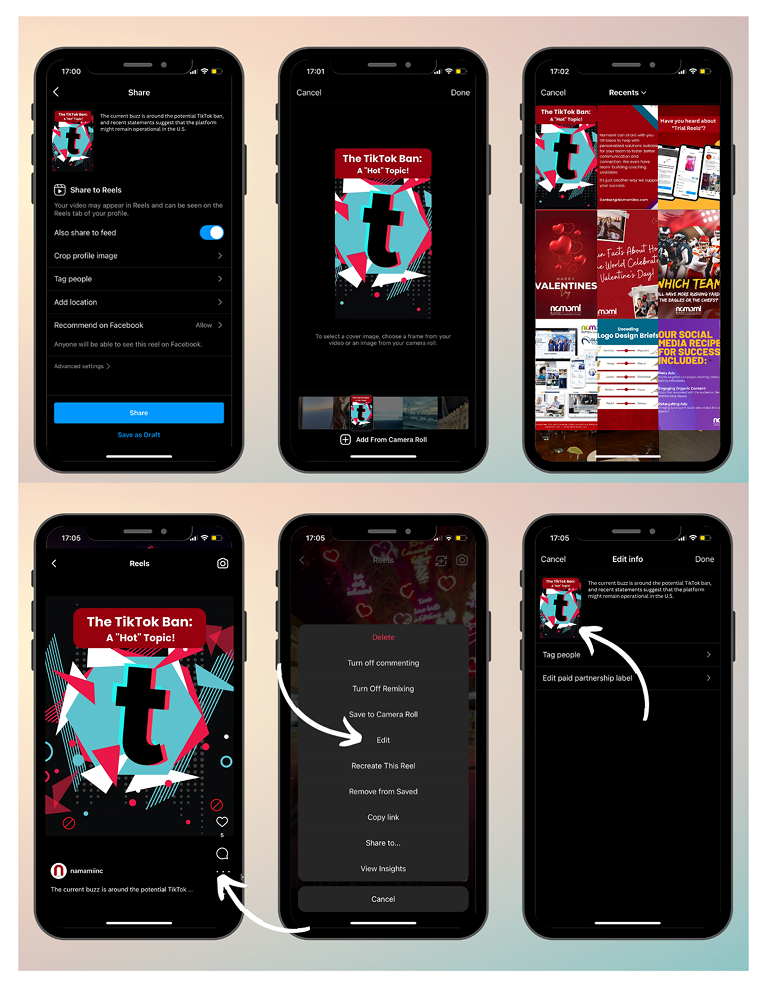
- After uploading, tap on the “•••” button in the top right corner of your Reel.
- Select “Edit” from the menu.
Step — 4
Add the Cover Photo:
- You’ll see a preview of your Reel with a placeholder image.
- Tap on the “Edit Cover” option.
- Choose between:
- “Select a Frame”: Choose a frame from your Reel as the cover.
- “Upload Photo”: Select the cover photo you previously prepared.
Step — 5
Adjust and Save:
- If you uploaded a photo, adjust the framing and cropping as needed.
- Once you’re satisfied, tap “Done” to save the changes.
Step — 6
Share Your Reel:
- Your Reel is now ready to share with your audience!
Always ensure your cover photo is high-resolution for the best visual quality.
How to Edit an Instagram
Reels Cover Photo
If instead of adding, you want to edit the cover, follow these steps:
- Open your published Instagram Reel
- Select the three dots on the side (below the share button)
- Select Edit
- Tap “Cover” on the preview image
- Select an image by dragging the slider to a clip from the Reel, or select “Add from Camera Roll” to upload an image from your phone!